

Restore Structural Integrity to Walls—Mount with Confidence in Under an Hour
The BoaBond™ Structural Wall Repair (SWR) Kit is a two-component expanding epoxy system designed for load-bearing repairs in drywall, wood, masonry, and plaster. More than a patch, BoaBond creates a high-density, rigid repair that supports hardware installation—holding screws, anchors, or fasteners with real structural strength.
Unlike traditional putties or spackle—which simply fill gaps—BoaBond SWR expands to reinforce the substrate. It eliminates the need for cutting open walls to add wood backing and is ideal for residential, commercial, and light construction settings. It’s safe, solvent-free, and applies easily, even to damp or irregular surfaces.
[3] 50ml cartridges of BoaBond SWR adhesive
[1] PAK-50 manual dispensing gun
[10] Static mixing nozzles (Xemex)
[3] Injection plates with integrated ports
[1] 2″ x 10′ wall-repair mesh roll
[1] Durable carrying case
Fiber-reinforced wall panels (FRP)
Supports up to 50 lbs per anchor point – Ideal for hardware, signage, and more
35–65% volume expansion – Fills irregular voids and holes up to 1″
Cures rigid and strong – Paint, sand, or drill after full cure
Fast return to service – Mount hardware in as little as 1 hour
No solvents or isocyanates – Safer for occupied spaces and enclosed installs
Performs across temperature extremes – Application: 50°F–95°F; Service: -40°F–95°F
Adheres to damp, painted, or raw surfaces – No primer needed for most applications
Fix stripped drywall anchors or wall blowouts
Mount towel bars, curtain rods, shelves, signs, or decorative hardware
Anchor light-to-medium duty fasteners in drywall, block, brick, or cement board
Retrofit reinforcement for wall-mounted devices (without opening the wall)
Repair damage in residential homes, offices, retail spaces, schools, or hotels
Ideal for general facility maintenance and construction retrofits
| Property | Value |
|---|---|
| Color (Mixed) | Medium grey |
| Working Time (Open Time) | 3–5 minutes |
| Return to Service | 1 hr (1″ hole), 4 hrs (½” hole) |
| Full Cure | 1 day; full strength in 7 days |
| Viscosity (Part A / B) | 1,400–2,000 Pa·s / 35,000–45,000 cPs |
| Cured Density | 0.7–0.9 g/cm³ |
| Volume Expansion | 35%–65% |
| Application Temp Range | 50°F–95°F (10°C–35°C) |
| Service Temp Range | -40°F–95°F (-40°C–35°C) |
| Shear Strength (general) | >45 lbs (200 N) |
| Shear Strength (½” drywall) | 16 lbs (70 N) |
| Shelf Life | 12 months @ ≤77°F and 50% RH |
Drywall (painted or raw)
Plaster
Wood
Concrete & cement board
Brick & CMU (block)
Masonry surfaces
Plywood & painted wallboards
Fiber-reinforced wall panels (FRP)
Testing recommended for painted or unusual surfaces. Always test compatibility before final install.
Reinforce your wall in six easy steps.
| Step | Instructions | |
|---|---|---|
| Step 1: Clean the Hole | Scrape away any loose or crumbling debris using a utility knife. Wipe the area clean with isopropyl alcohol to ensure a strong bond. | 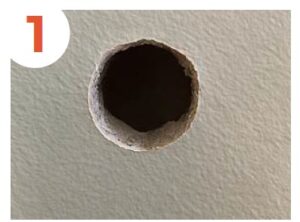 |
| Step 2: Apply Mesh Patch | Cut a piece of mesh about twice the diameter of the hole. Press it firmly into the opening to reinforce the cavity. | 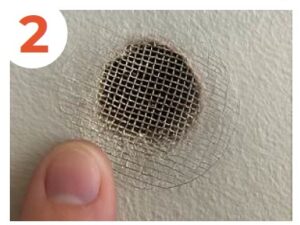 |
| Step 3: Set Injection Plate | Place the injection plate over the mesh with the port at the top. Secure it in place with painter’s tape. | 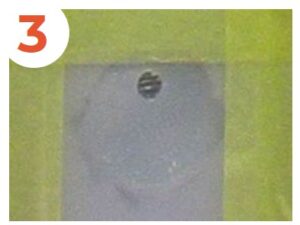 |
| Step 4: Prep the Cartridge | Insert the cartridge into the dispensing gun. Remove the cap and attach the nozzle. Dispense a 4″ bead to ensure a proper light blue mix. | 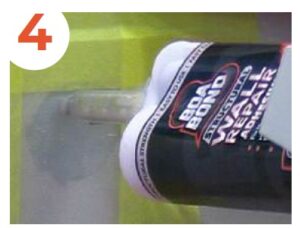 |
| Step 5: Inject the Adhesive | Insert the nozzle into the port and fill the cavity from back to front. Tape over the port to contain material and allow it to cure. | 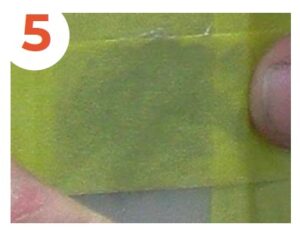 |
| Step 6: Finish the Repair | After curing, sand the area flush with the wall surface. Paint, texture, or drill as needed to complete your repair. | 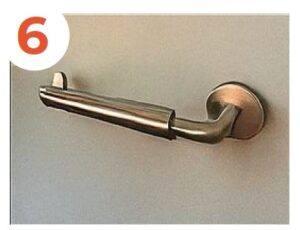 |


